Bridge Replacement and Adjustment Guide
for Traditional African Harp / Travel African Harp
Introduction
This article explains how to replace and properly position the bridge on a traditional African harp or a travel African harp.
The guide applies both to full bridge replacement and to positional adjustment without complete removal.
Core Principle
One of the most important aspects of a traditional African harp’s sound is the correct positioning of the bridge and the strings resting on it.
Improper geometry may result in:
degraded sound quality,
structural damage risk.
Ideally, the angle between the bridge base and its vertical axis should be 90° or slightly more.
Bridge and Base
The bridge is a vertical structural element with notches (also referred to as slots or string rests) along its sides, where the strings are positioned.
Through the bridge, string vibration is transmitted to the membrane or the soundboard of the instrument.
The base (also referred to as the foot) is the lower part of the bridge that makes direct contact with the membrane or soundboard.
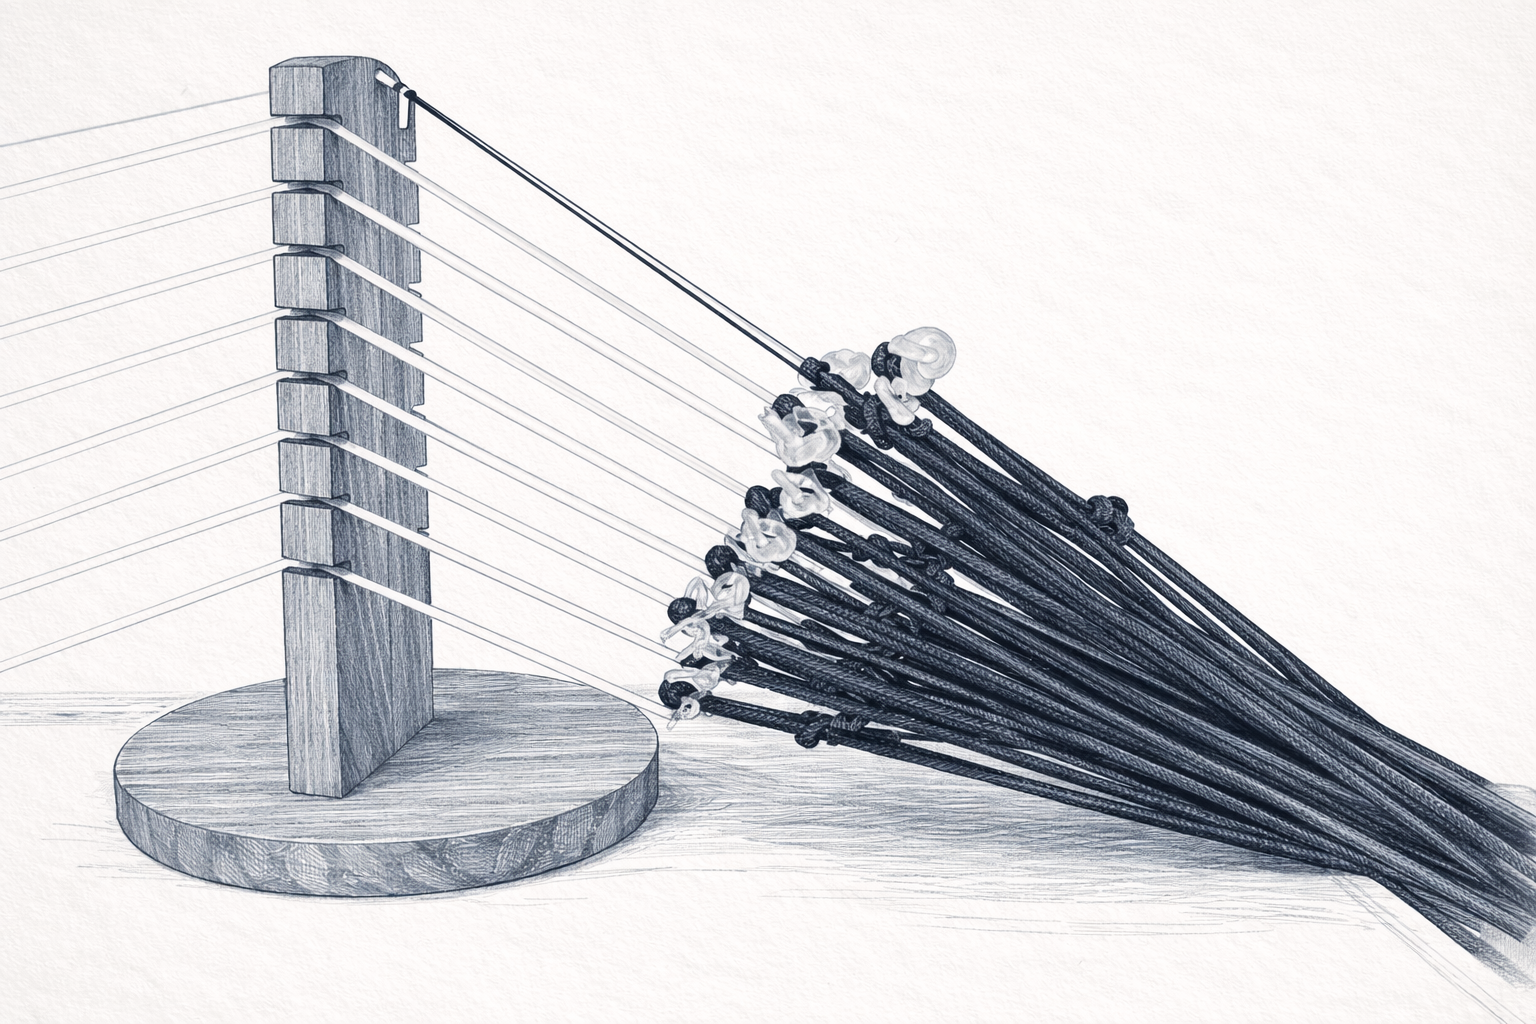
Anchor
The anchor is typically a metal element (ring, loop, or hook) installed at the lower part of the neck.
It serves as the structural attachment point for:
individual string lanyards,
the bridge lanyard.
Without a properly secured anchor, correct string tension and bridge alignment cannot be maintained

Leashes
Leashes are cords linking instrument parts to the anchor.
String leashes — short cords linking each string to the anchor. Carry each string’s load and allow easy replacement.
Bridge leash — longer cord linking the bridge’s top to the anchor. Holds the bridge under combined string tension and sets its angle.
Adjusting the bridge leash length and base position changes the bridge angle.
Bridge Adjustment and Replacement Procedure
When Adjustment Is Required
In most cases, bridge adjustment becomes necessary when the bridge leash gradually stretches over time.
As a result:
the bridge begins to tilt forward,
the angle between the bridge and its base becomes less than 90°,
unwanted buzzing or additional noise may appear on the strings.
This condition is undesirable and should be corrected.
Preparing the Bridge for Adjustment
To prepare the bridge for adjustment, the strings must be removed from the bridge notches, but they should not be detached from the instrument entirely.
Proceed as follows:
Begin with the shortest (lowest) strings.
Lower the strings from the one at a time.
Alternate sides while working.
Hold each string carefully with your fingers and lift it out of its notch.
Lower the string gently down toward the base of the bridge.
In most cases, it is not necessary to loosen the string tension for this procedure.
Continue alternating from side to side until only the two thickest (bass) strings remain — one on each side. This maintains a small amount of load on the bridge and keeps it relatively stable.
At this stage, minor repositioning of the bridge base on the membrane or soundboard can be performed if needed to adjust the bridge angle.
Full Release of the Bridge
If partial release is not sufficient and the angle remains incorrect, remove the final two bass strings.
At this point, the bridge is completely free of string load and can be moved freely.
If the goal is to replace the bridge rather than adjust it, this is the stage at which the old bridge can be removed. A new bridge may then be placed in position.
Before reinstalling the strings, ensure that the bridge is positioned exactly at the center between the two handles on the soundboard. The bridge must be strictly centered and aligned perpendicular to the direction of the strings.
Once properly positioned, proceed with the leash adjustment and string reinstallation steps described below.
Adjusting the Bridge Leash
With the bridge free of string load:
Untie the bridge Leash knot.
Move the bridge and its base slightly closer to the anchor — toward the string knots.
Allow a small margin to compensate for stretch under load.
Position the bridge vertically, or slightly tilted toward the anchor.
Pull the leash until it is under proper tension.
Tie the knot securely.
At an intermediate stage, you may temporarily reinstall one bass string on each side to lightly stabilize the bridge while adjusting the leash.
Reinstalling the Strings
After adjusting the leash length, begin reinstalling the strings.
Start with the thickest, longest (upper) strings.
Install the strings one at a time.
Alternate sides while proceeding.
After each pair, check the bridge position.
As the strings are reinstalled, you may gently press the upper part of the bridge toward the neck — in the direction the strings will naturally pull it. This helps the leash settle under working tension.
By gradually reinstalling the strings and continuously monitoring the bridge angle, return all strings to their proper positions.
Final Notes
After installing or adjusting the bridge, the harp must be tuned.
Even if the strings were not fully removed from the instrument, any change in bridge position or leash length will affect overall tension and pitch.
Following bridge replacement or leash adjustment, it is advisable to monitor the bridge position over the next several days.
Under full string tension:
the bridge leash may settle,
slight stretching may occur,
the bridge angle may change subtly.
If necessary, minor corrections can be made during this settling period.
Careful observation after adjustment helps ensure long-term stability, proper tone, and reliable performance of the instrument.
I wish you success in the adjustment process.
If you have any questions or feel that something important has not been covered in this article, I am always open to communication and will be glad to help.